Moodle Primer Part 1: Creating a Class
- By Emmett Dulaney
- 10/03/07
In a
recent article, I mentioned my newfound affection for the open-source course management system Moodle. It's a great CMS, but there's not a lot of current information available on it. So, in this two-part tutorial, we'll walk through the use of it, starting in Part 1 with the creation of a class and setting up the resources needed for it. (In Part 2, which will appear next week, we'll examine the administration of the course once it's created and available.)
SettingsTo create a course, the first thing you must do is establish its settings, or attributes. This is accomplished on the Edit Course Settings page, as shown in Fig. 1. While all of the settings are important, those beneath the General frame truly dictate everything else. The two name fields define what students will see when they look at all the courses that are available in your Moodle implementation and should be descriptive enough to head off phone calls from those who cannot find the course they're supposed to be taking.
 Fig. 1: The Edit Course Settings page allows you to define the key attributes of the course. Click to enlarge image.
The Summary field holds free text and a great many tools in the toolbar that you will see throughout when dealing with text fields. A recent addition to the toolbar is that of Spell Check (third from the end on the second row) that has been greatly missed.
The Format can be weekly, topics-based, or any of a number of other choices. For traditional courses, the weekly format works well, but, if you're using rolling enrollment (such as with prerequisite courses that will always be open), then the topics-based option is a better solution.
Beneath the General frame are a number of frames related to enrollment. Here you can choose to limit the enrollment, cluster students into groups, allow guest access, and so on. Most importantly is the field beneath the Availability frame that allows you to set the enrollment key. This is a string value you specify that the students must give in order to enroll in the class. They will not be able to enroll in the class unless they give this value, and they must only give it the one time.
OutlineAfter you choose to save your settings, you are presented with the course in an outline view, as shown in Fig. 2.
Within the left frame, you have People, Activities, Search Forums, and Administration. The People section links to the participants and will allow you to see who has enrolled in the course and what they have done after you have it live. The Activities section will provide quick links to each type of resource you add. (For example, after all the quizzes are in, a Quizzes link appearing beneath here will take you straight to them and allow you to see how many have taken each.) The Search Forums section is self-explanatory, and Administration holds links to items you want to know well:
- Turn Editing Off/On is a toggle that allows you to only look at what is there or make changes to it.
- Settings takes you to the Settings page and allows you to make changes to attributes of the course, enrollment, etc.
- Assign Roles allows you to choose between Guest, Student, and so on. The roles you assign, just as with permissions in operating systems, and such, define what the user can do.
- Groups allows you to create different groups. This is handy if you are teaching more than one section of the same course and want to separate out each.
- Backup and Restore allow you to save copies of your course and bring them back.
- Import gives you the ability to import resources, such as test questions, from other sources. You can import activities or even groups.
- Reset is the one choice to be very cautious with. It resets – i.e. clears - the course and this can be disastrous if not the choice you were intending to make.
- Reports allows you to look at activity logs.
- Questions shows you the questions you have and allows you to import and export.
- Scales lets you choose a learning style other than the default and should be avoided unless you are experienced in this area.
- Files lets you see files that are uploaded/downloaded.
- Grades will show the grades that students have obtained thus far.
- Unenroll, as the name implies, removes you from the course (not a good idea).
With editing turned on, as is the case in Fig. 2, you can choose to add resources and activities to each week. A resource can be a label, text page, Web page, link, directory, or IMS content package. While you can use Moodle as an interface within which to compose a text or Web page, that is not its greatest strength; if you're familiar with another text or HTML editor, I would suggest continuing to create those types of elements with those editors.
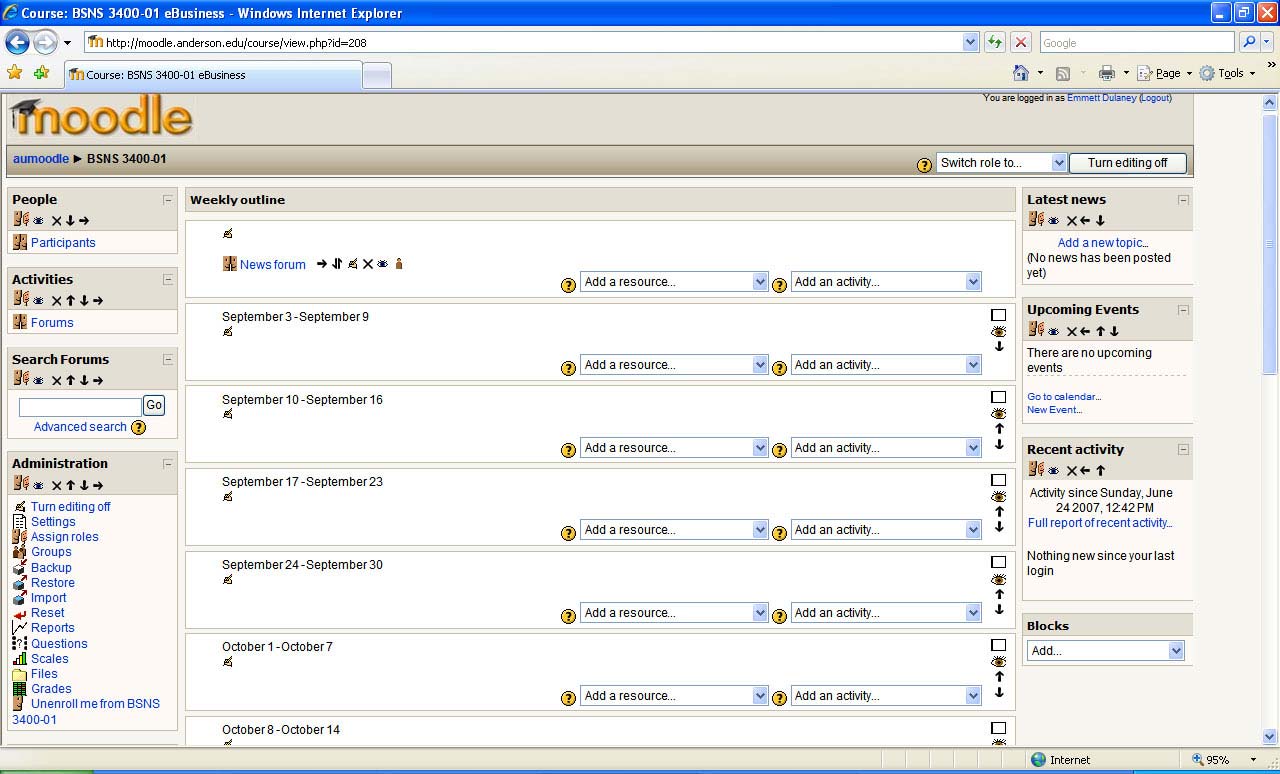 Fig. 2: The Outline view allows you to begin adding course elements. Click to enlarge image.
An activity can be (among other things) an assignment, chat, database, forum, glossary, lesson, quiz, survey, wiki, or workshop. By default, items appear for the week in the order in which you add them. (You can always move them, but it is always easier if you don't have to.) For that reason, I suggest adding them in the order you want the student to view them. What follows is an example for one week.
Adding a LabelLabels are probably the simplest elements of all to add. These are used just as identifiers for the material. By default, they will appear the same size as everything else within the week, and so I recommend increasing the font size on them and bolding in order to make them stand apart from everything else.
Adding a LinkAdding a link to a resource is almost as simple as adding a label. You must give a name, specify the link, and, optionally, supply a description. You can choose that when the link is clicked the resource will appear in the same window or a new window.
Adding a QuizAs an example, a quiz will be added to this course that will be open-book and must be taken before the start of class (8:30 a.m. Sept. 6). The reason for the quiz is to encourage the students to have at least some familiarity with the assigned chapter and thus be better prepared to discuss it during class.
Choosing Activity and then Quiz opens the Editing Quiz page shown in Fig. 3. Because this is an open-book quiz, there are two approaches that can be taken: The first is that the students are allowed as much time to take it as they wish, and the second is that they should already have read the material at least once before starting. Preferring the latter approach, I've limited the amount of time on the quiz to 10 minutes.
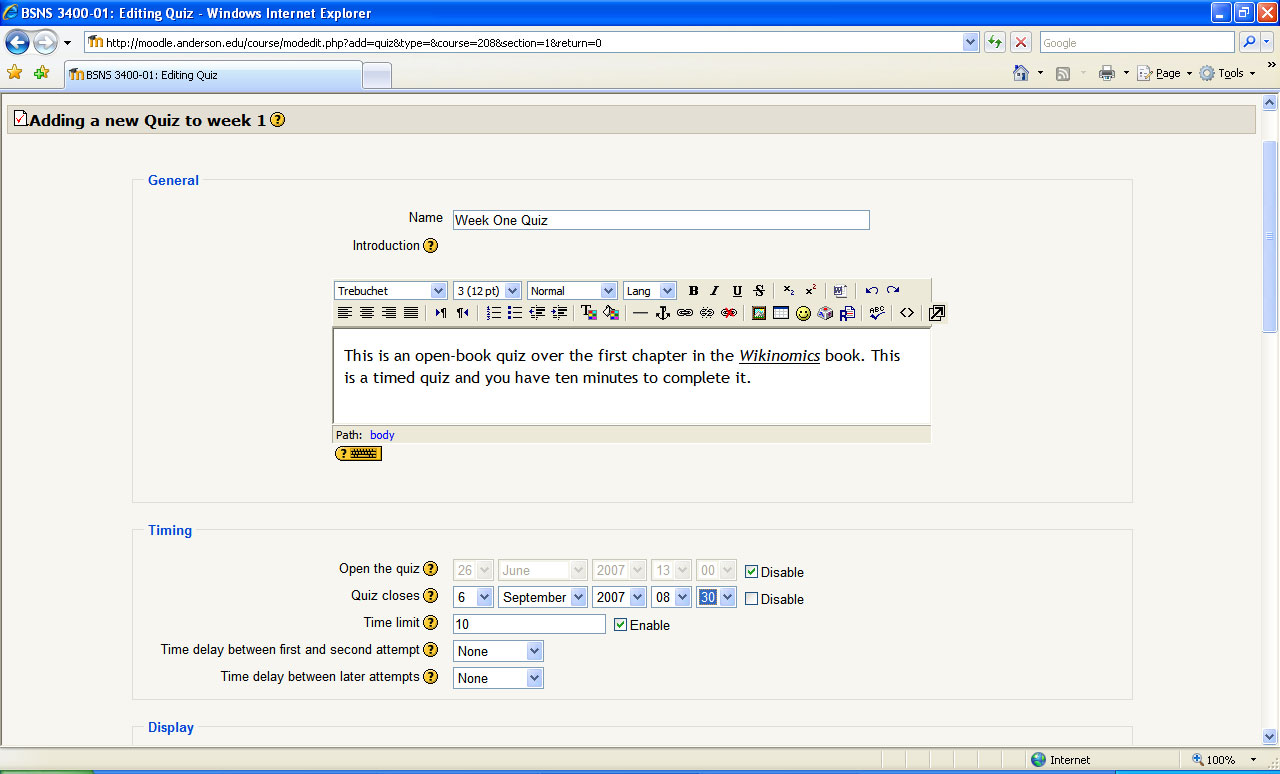 Fig. 3: Begin defining the attributes for the quiz. Click to enlarge image.
Further down on this screen, you can configure actions as shown in Fig. 4. Notice that I've selected that the questions shuffle within the quiz, and the answer choices shuffle within each question. This way, if two people are taking the quiz at the same time, it makes it more difficult for them to compare what they are doing. Adaptive mode has been turned off: When it is on, the students can submit each answer one at a time and see whether they are right or wrong. If they are wrong, they can try again and have their score reduced by only a small portion of the total score.
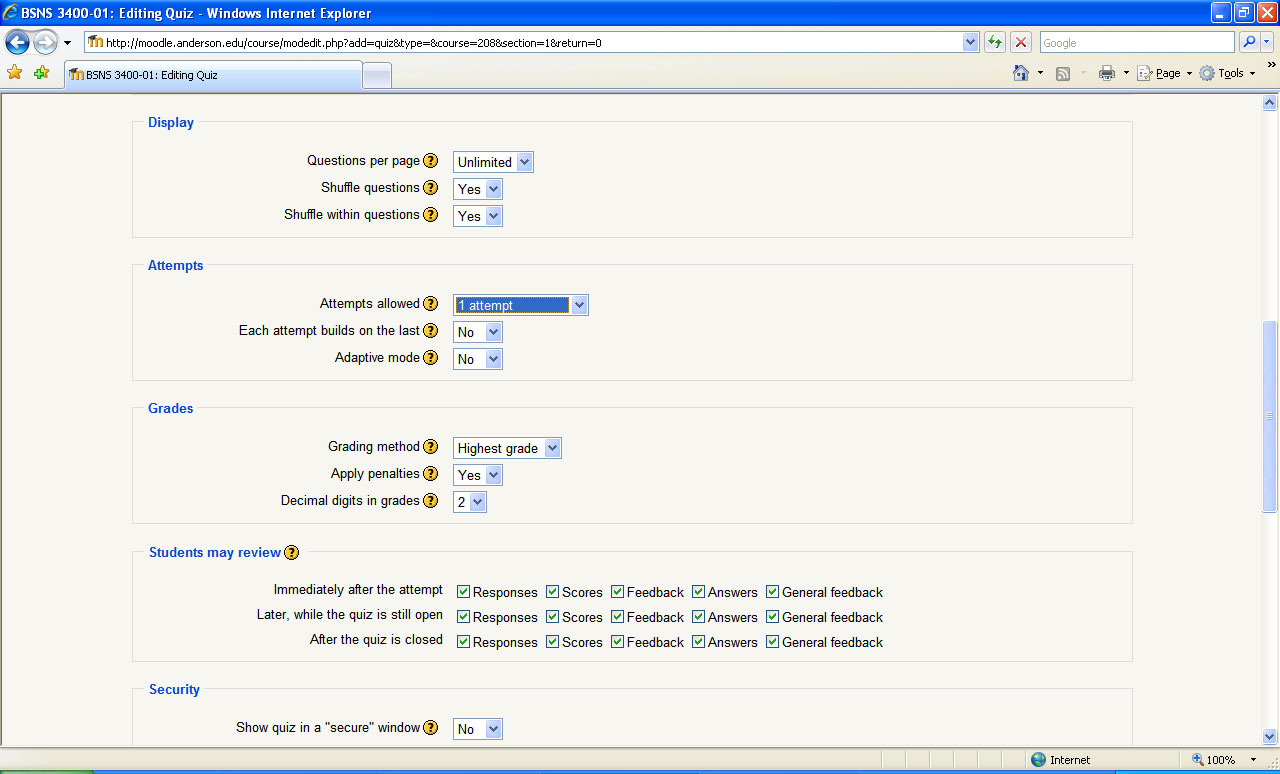 Fig. 4: The additional attributes for the quiz. Click to enlarge image.
I have also chosen to limit the number of attempts to only one and allow them to see their results immediately upon finishing. At the bottom of this screen, you can provide the feedback that will be given based upon the score that is obtained on the quiz. The feedback, and boundary, I typically use is:
85% - 100%: Excellent!
70% - 85%: Good work.
60% - 70%: Be sure to read the material more thoroughly.
40% - 60%: You will need to do better on future quizzes.
Click on Save Changes, and you can begin adding questions to the quiz, as shown in Fig. 5.
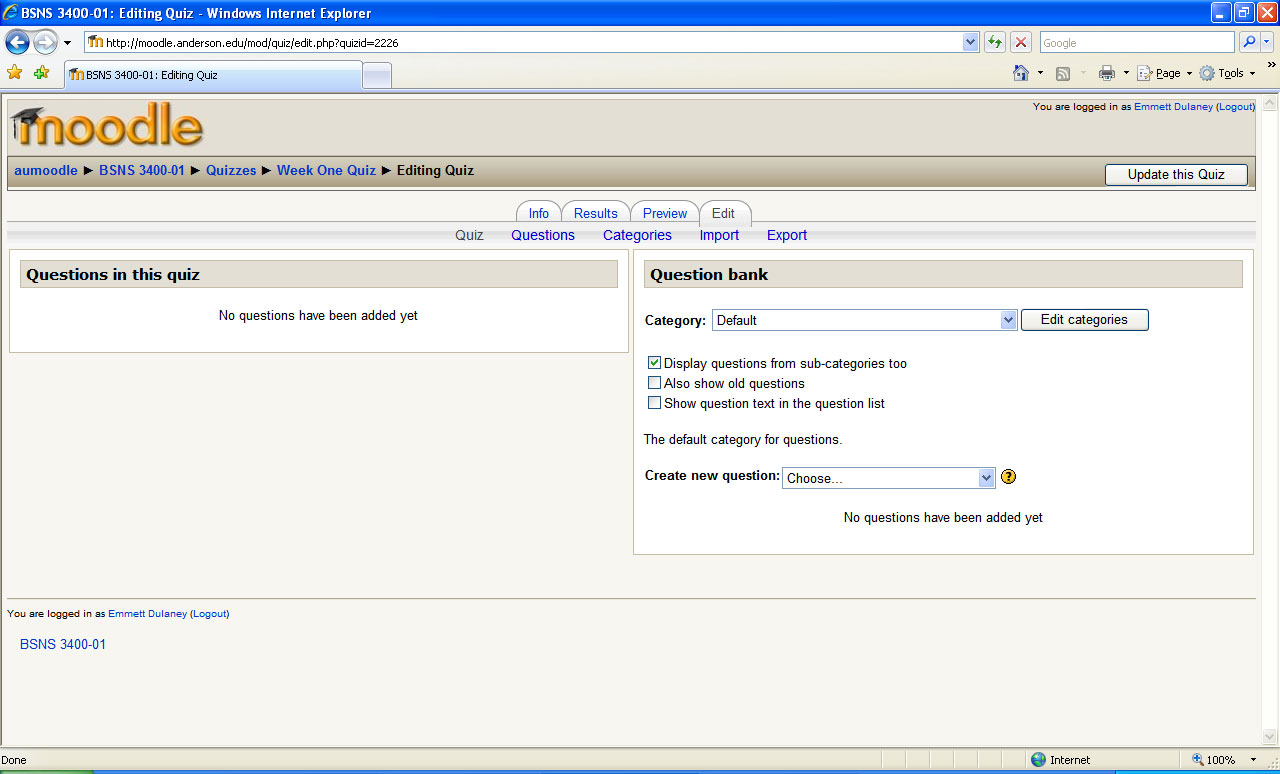 Fig. 5: Once the attributes for the quiz have been defined, it is time to add the questions. Click to enlarge image.
Questions can be any of many types with the most common being short answer, multiple choice, and matching. The first order of business is to create a category to hold the questions you are going to create, then simply begin creating them.
Fig. 6 shows the beginning of a multiple choice question. This one has but one right answer, and six possible choices are given for it. Since there is only one right answer, 100 percent of the possible points (five, in this case) are given to the right answer, and nothing is subtracted for incorrect answers.
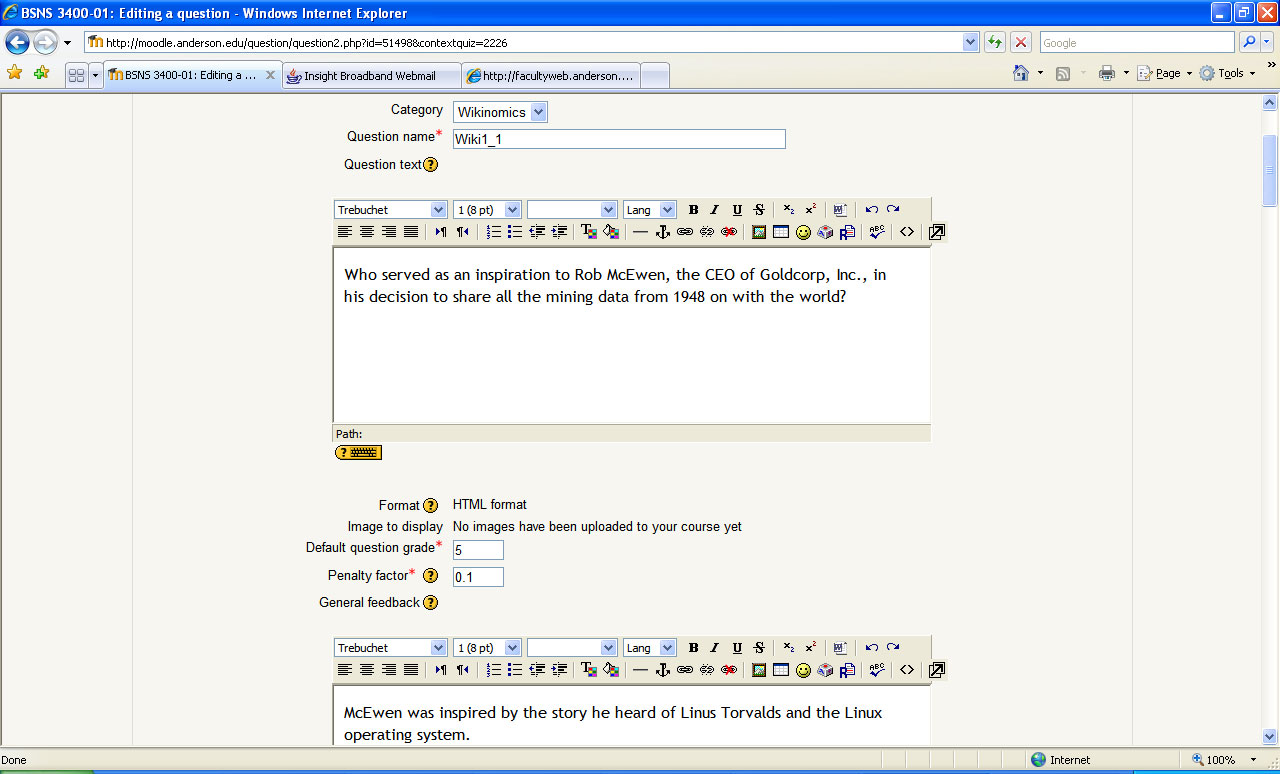 Fig. 6: It is easy to create questions within the interface. Click to enlarge image.
You can choose to give partial credit, reduce scores for some answers, and set a plethora of other options, but at least one question (or set of questions) should be worth the 100 percent, or you will get an error message telling you to correct this. Fig. 7 shows how this question will look when viewed by the student.
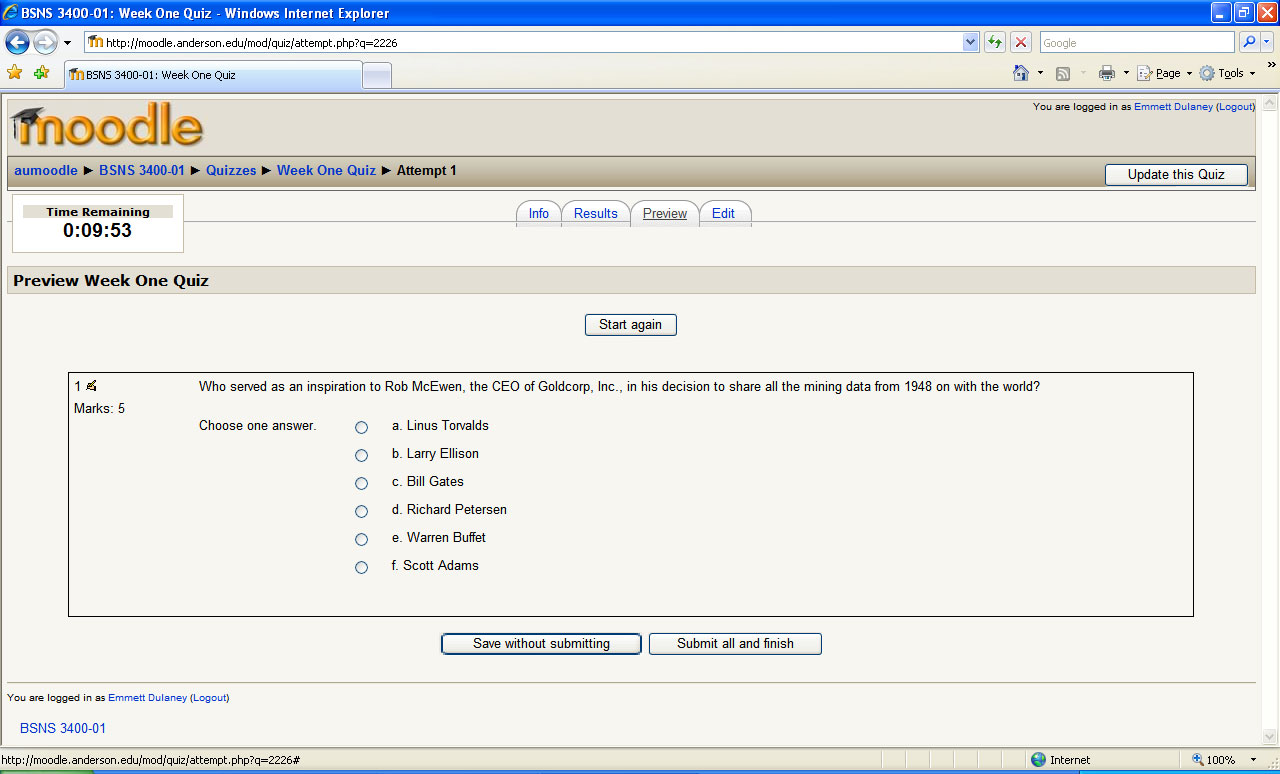 Fig. 7: How the question will appear to the student. Click to enlarge image.
After you've begun adding questions, a checkbox will appear in addition to those already present in Fig. 5. That checkbox, visible in Fig. 8, will give you the ability to add random questions. This can be extremely useful in trying to make sure that students are not working together on the quizzes. Obviously, the more random questions you add to the pool, the less likely the same question is to be used frequently.
 Fig. 8: The quiz is now created and random questions can be added if desired. Click to enlarge image.
When all of the questions for the quiz have been entered, save the changes, and you are done.
What the Student SeesNow that a label, link, and quiz have been added, the week is pretty well finished and the process simply needs to be replicated for each of the remaining weeks. When the student logs in, they will see the interface shown in Fig. 9 and be able to access the resources and activities.
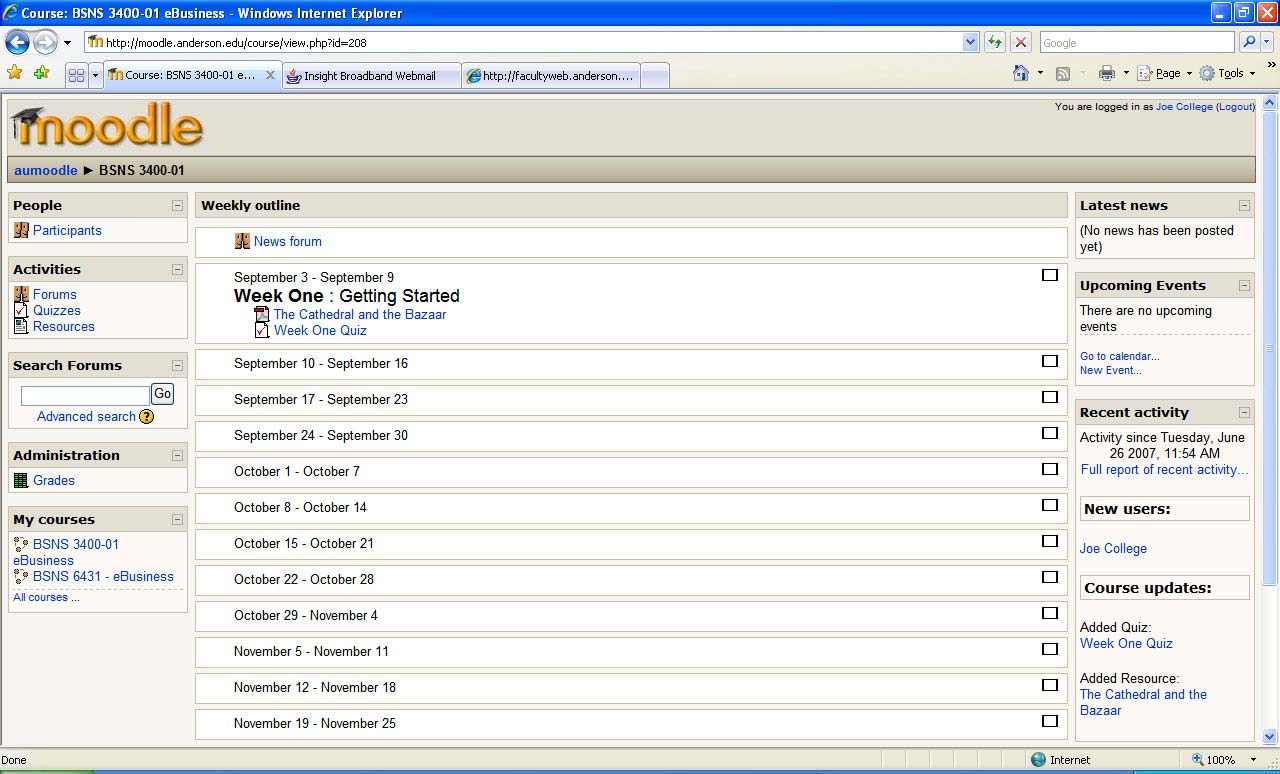 Fig. 9: What the student sees. Click to enlarge image.
In the next installment, we'll focus on the administration that must take place once students do begin taking the course.